Back again with another bird painting. This one is a great blue heron. These prehistoric birds are all over the place where I live, and I hope you have them where you live too. Here they stalk the tide pools and seashore looking for small fish to eat. I've even seen them in the fields and on the golf course looking for mice or moles. A big one can stand in excess of 4 feet tall. I don't know what its wingspan is, but its big. They will stand motionless for quite a while waiting for a tasty morsel to come into range. As soon as it does,... Whammo! Thats is. Feeding time.
I've got a nice heron her for you to view. He is in a classic standing stance. Just surveying his surroundings, waiting, biding his time. I've used a healthy dose of cerulean blue in this painting. Used it both in the bird and on the background. The bird itself is tempered with a little mix of my own grey too.
For those of you interested in seeing how I painted it, you can view the action below. Even if you don't give a view to the video, thanks for taking the time to read a bit about this bird. Enjoy the video.
So, I went fishing and didn't catch anything. As a consolation, I painted this fish. Ok, thats not actually how the story goes. I did go fishing. I didn't catch anything. I did have fun fishing with my children. That fishing trip had nothing to do with this painting.
I've been meaning to paint a betta for quite some time. My friends over at Doodlewash painted one about the time I was getting started. I didn't want to post mine close to the time that that one was painted. So I waited. Finally, I was kicking around the studio the other day when I came across the reference photo for this. Finally, I had to paint it. I will admit that the background needs a bit of work. I wanted a really mottled background that had a lot of interest. What I ended up with it s a background that is rather plain. I will admit that I am a bit disappointed with it. But no mind. It is what it is. I enjoyed the experience painting it. You can too by viewing the video below.
Thanks for the view. Hope you enjoy.
If you want to see the video in less than half the time, there is a speed painting of it too.
So, I have started painting my Christmas or Holiday cards for this year already. I want to start early. Last year I got a little behind, and it was hard trying to catch up. So here is the first one that I am posting. It is of course some hanging ornaments.
You might wonder how I got the balls so perfectly round. Well, let me tell you. Electrical Tape. It is the perfect size for balls on a 5 x 7 card.
So, I figure I've got about 20 cards to paint. It seems like a lot, but not a lot. Between work, family and friends, that could easily be many many more. I've limited the number to just those that have made the biggest impact in my life over the previous year.
The cards? Well, last year, i bought packs of them at the local hardware store. This year.... Amazon. I got a pack of 100 for 30 bucks. Thats pretty good. I'm pretty sure that means I get them for 30 cents a piece.
I think this one looks pretty good, and its pretty easy to paint. If you have an interest in seeing how it did it, you can watch the video below.
I did a similar painting several months back. It just kind of happened organically. I didn't purposely go into thinking I would paint all the negative space around an object, but it kind of worked that way. In this painting, I specifically set about trying to paint only the negative spaces. I do with I had mixed in maybe a little purple or magenta with all the blue but I came out pretty neat.
Also, I think, that if I do this again, or maybe I'll go back and do it on this painting, that I'll incorporate some veins into the leaves. I did put the button in the middle of these flowers, but that was all. Perhaps a bit of veining will really bring this painting to the next level and give the leaves a little more texture and depth.
Well, regardless of whether I go back and do more or not, I had a great time painting this one. I hope you enjoy the painting, and if you would like to watch it, I do have a video of how I did it.
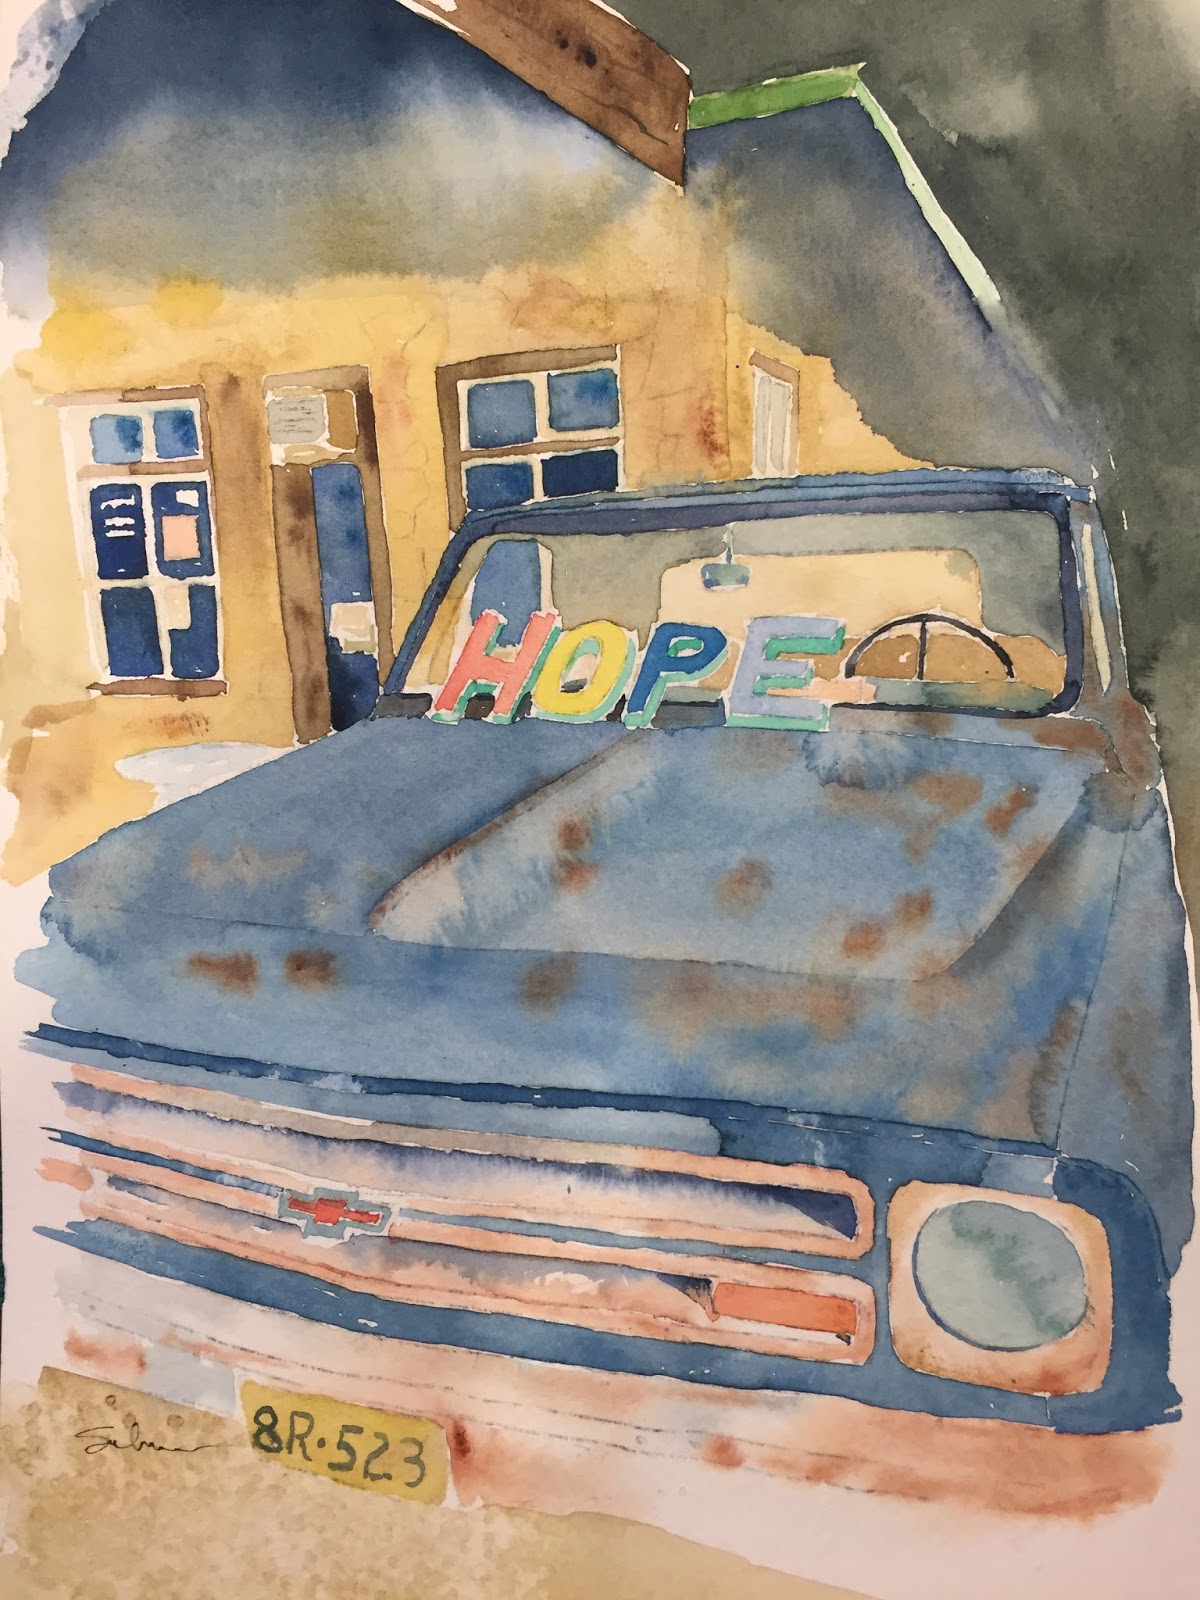
This is my latest painting. It is the HOPE truck from Dripping Springs, Texas. A friend of mine took the picture and it was too much for me not to paint it. I had a great time with this. I love all the rust and faded colors.
Painting the shadow and darkness at the top of the painting (under the eaves and the tree shadow behind the building) was completely terrifying to paint. I had what I thought was a good painting, but needing the shadow and I had to put it on. the color is so dark, I was afraid I would totally mess it up.
Luckily, I like the way it turned out.
I was told that maybe i should have left the windows jus ta bit lighter, and darkened the ground below the truck. Hmmm. Something to think about.
I love this painting. It is hanging proudly in my office. I'm so juiced at the way this one turned out, I can't wait to paint my next one.
Oh, and by the way, if you want to see how I did it, I do have a video. Thanks for the quick read. Hope you love the truck as much as I do.